The guide
Everything, step by step.
How to apply, upload, price your material, run live sessions and get paid — with the screens you will actually see. Two flows: Student Experts are current students; Facilitators are lecturers and instructors.
Becoming a Student Expert
You stay a student the whole way through. Approval takes 1–3 business days, and you can move between the student app and the expert view whenever you like.
Stage 1
Apply
Open the app menu and tap Become a Student Expert. Four steps, about five minutes. You cannot edit an application after submitting it, but you can withdraw a pending one and apply again.
-
Where to find it
Open the menu from the bar at the bottom of the app. Become a Student Expert sits near the bottom, under your wallet and notification settings.
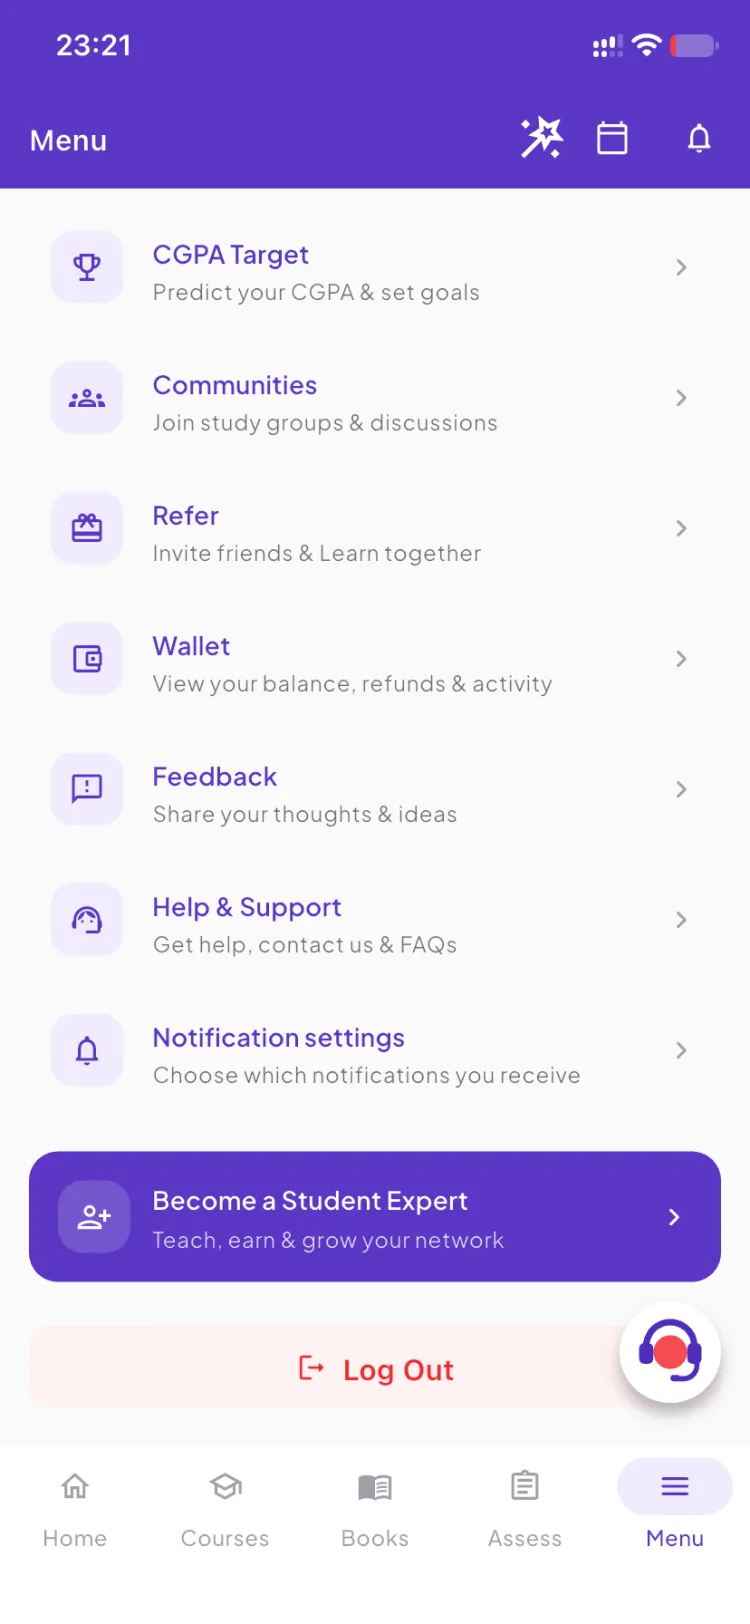
Near the bottom of the menu. -
What to have ready
The opening screen lists the four steps and what each one needs: your student ID card, a phone to verify, your transcript as a PDF and your current academic results.
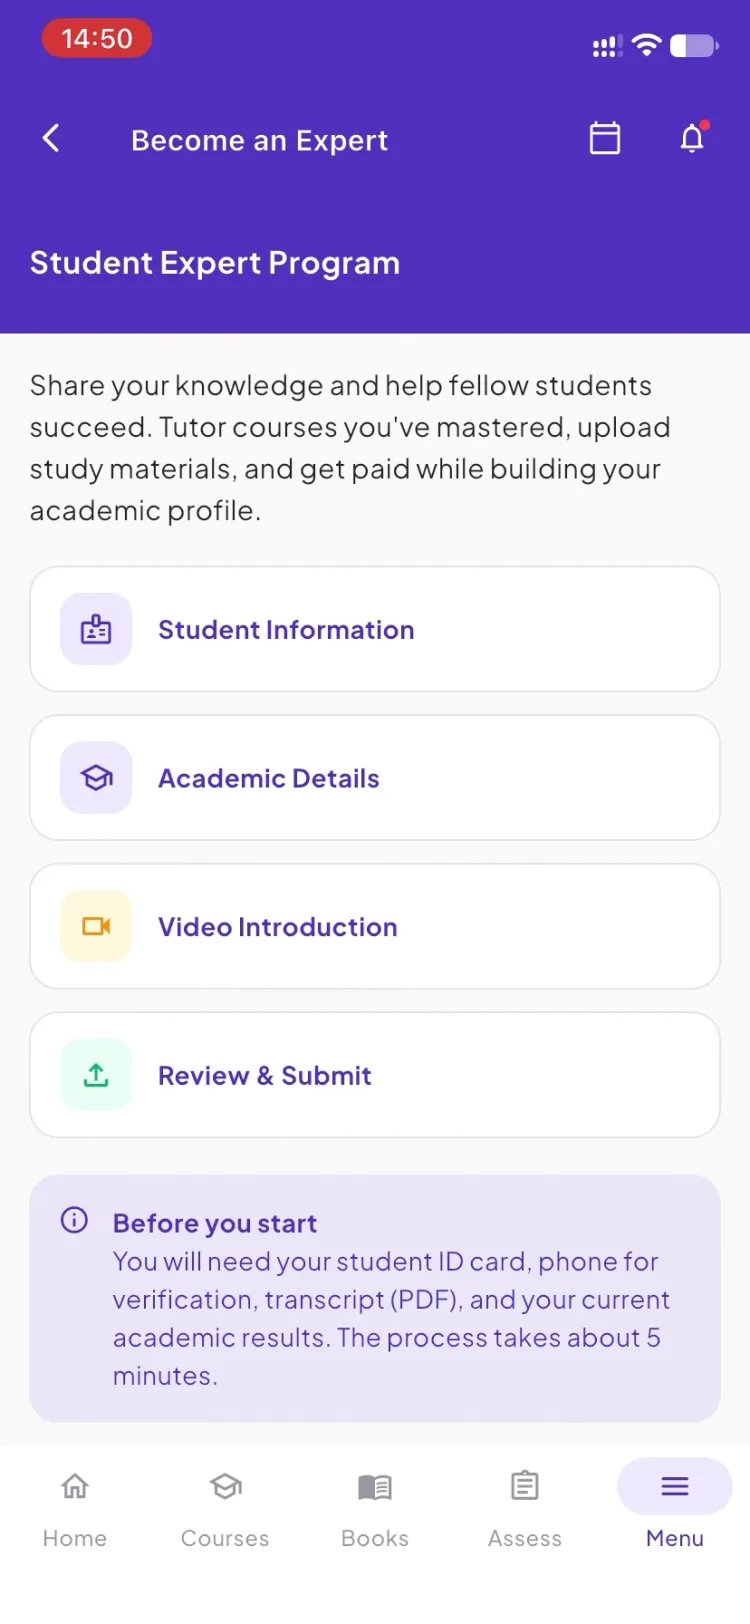
Everything the application asks for, up front.
-
Student info
Your student number, a clear photo of the front and back of your student ID, and a phone number you verify with a six-digit SMS code.
-
Academics
Your current CGPA out of 5.0 — it will be verified — your transcript (PDF preferred; JPG or PNG accepted, up to 10 MB), the year you are in, and up to three course units from your programme you are confident teaching.
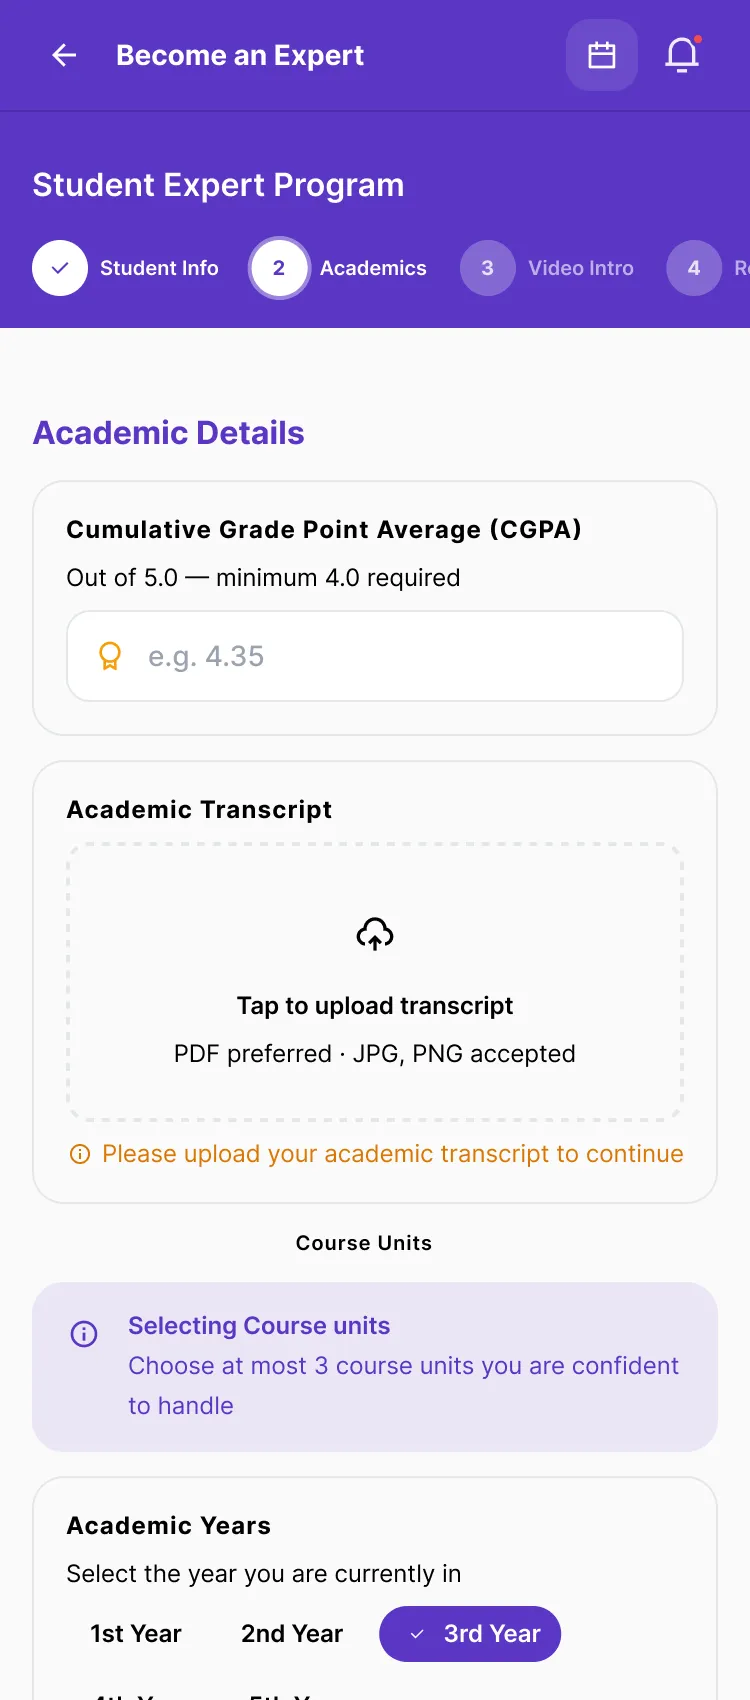
Up to three units from your own programme. -
Video intro
A 1–2 minute video about yourself, your academic journey and why you would make a good Student Expert. MP4, MOV or WebM, up to 100 MB. You choose whether it is public or visible to admins only.
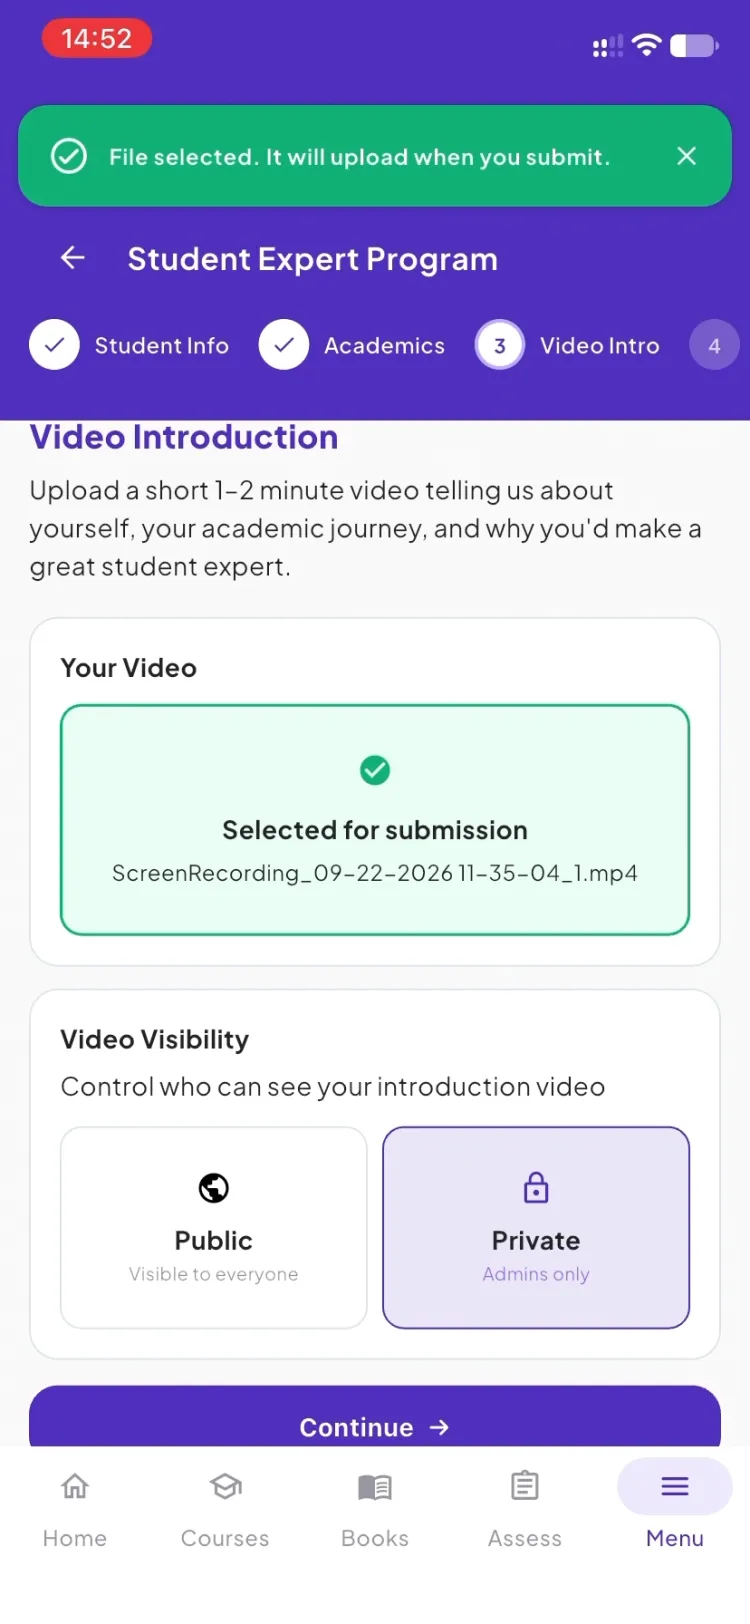
Public, or admins only — your call. -
Review and submit
Check everything, then submit. The admin team reviews within 1–3 business days and you are notified in the app. If it is not approved you see the reviewer's note, and you can fix the details and apply again.
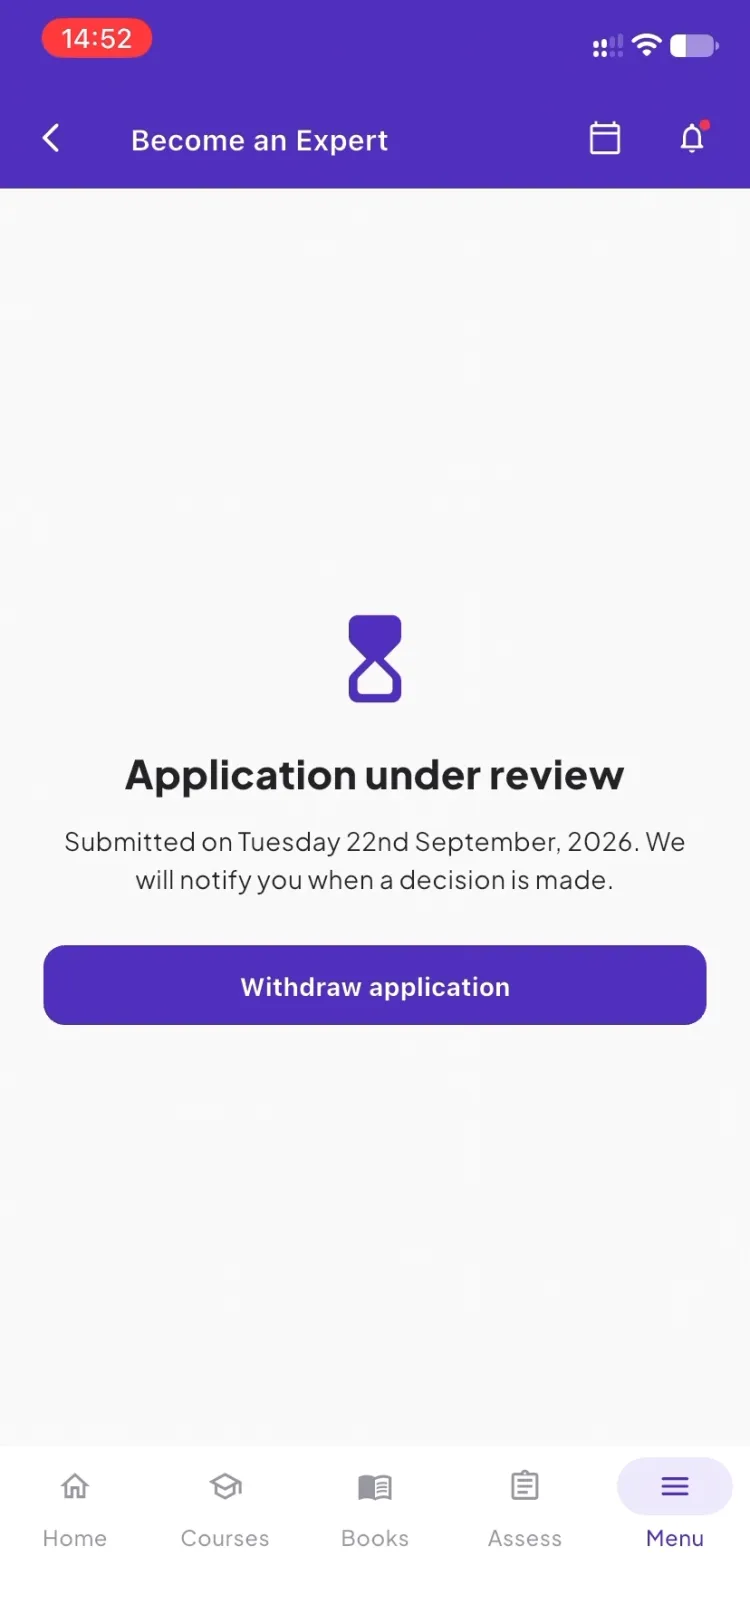
What you see once it is in: pending, and withdrawable.
-
After approval
The menu gains Switch to Student Expert View, which is where analytics, uploads and content management live. You can move back and forth whenever you like — you are still a student.
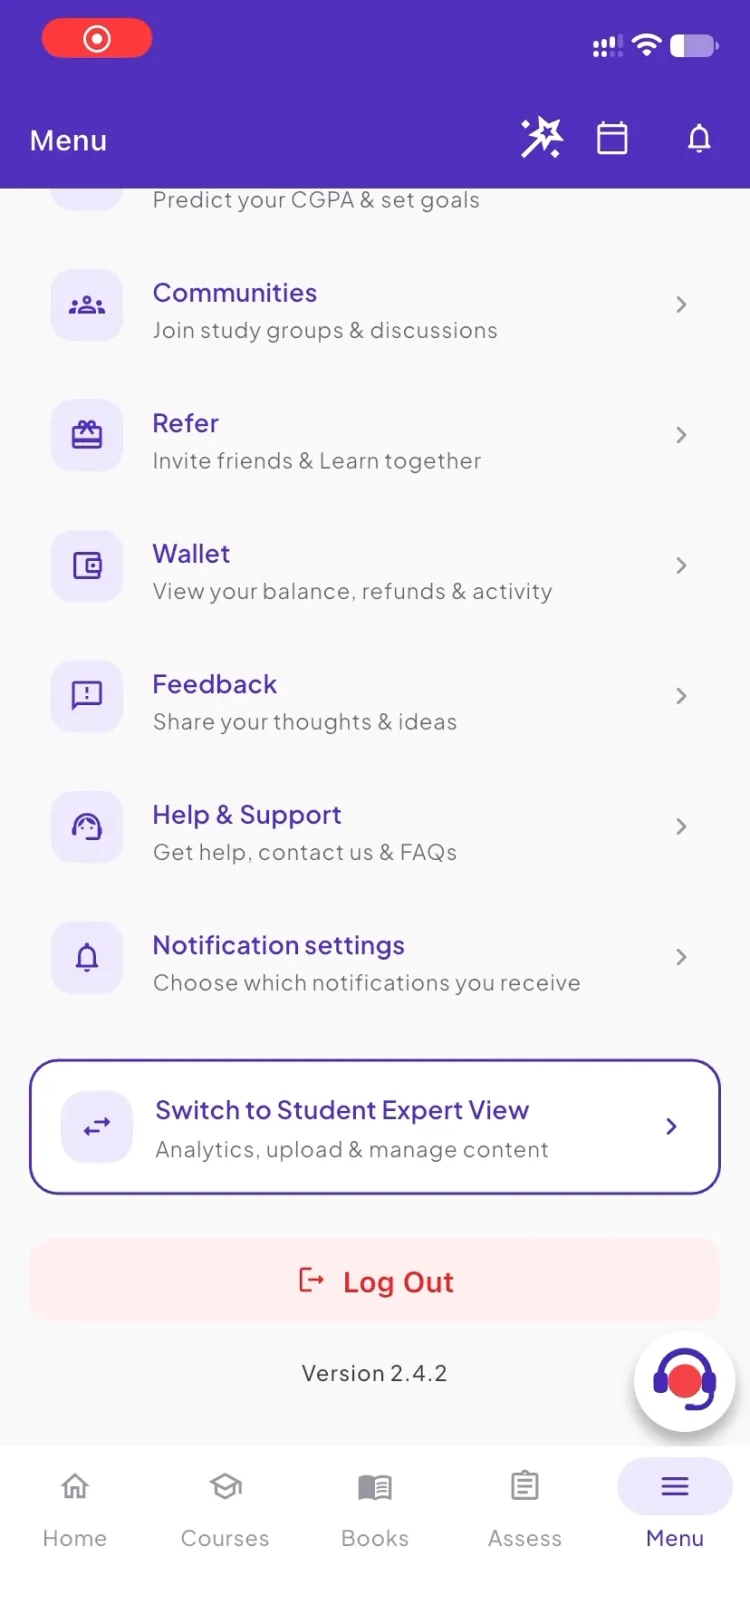
The same menu, one entry richer.
Stage 2
Upload and price
From the expert view, Upload Content walks you through year → course unit → type → files. Content is always attached to a specific course unit, so students find it in the right place.
-
Pick the course unit
Year first, then the unit. You can only upload to the units on your approved application.
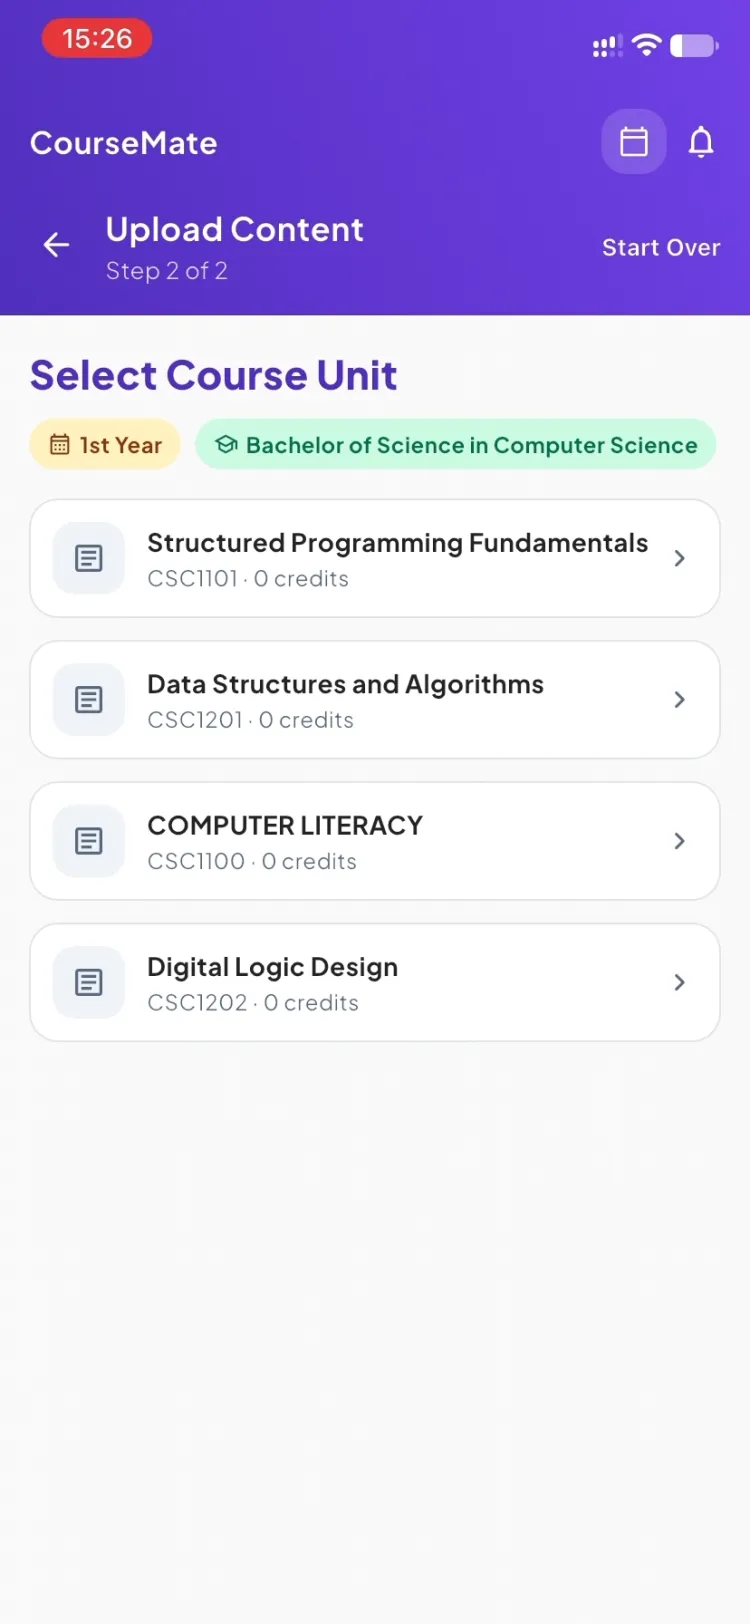
Year and programme first, then the unit. -
Choose the type
Video tutorial, notes, summary or cheatcode, past papers, timetable, course outline, or books. The type decides where students see it inside the unit.
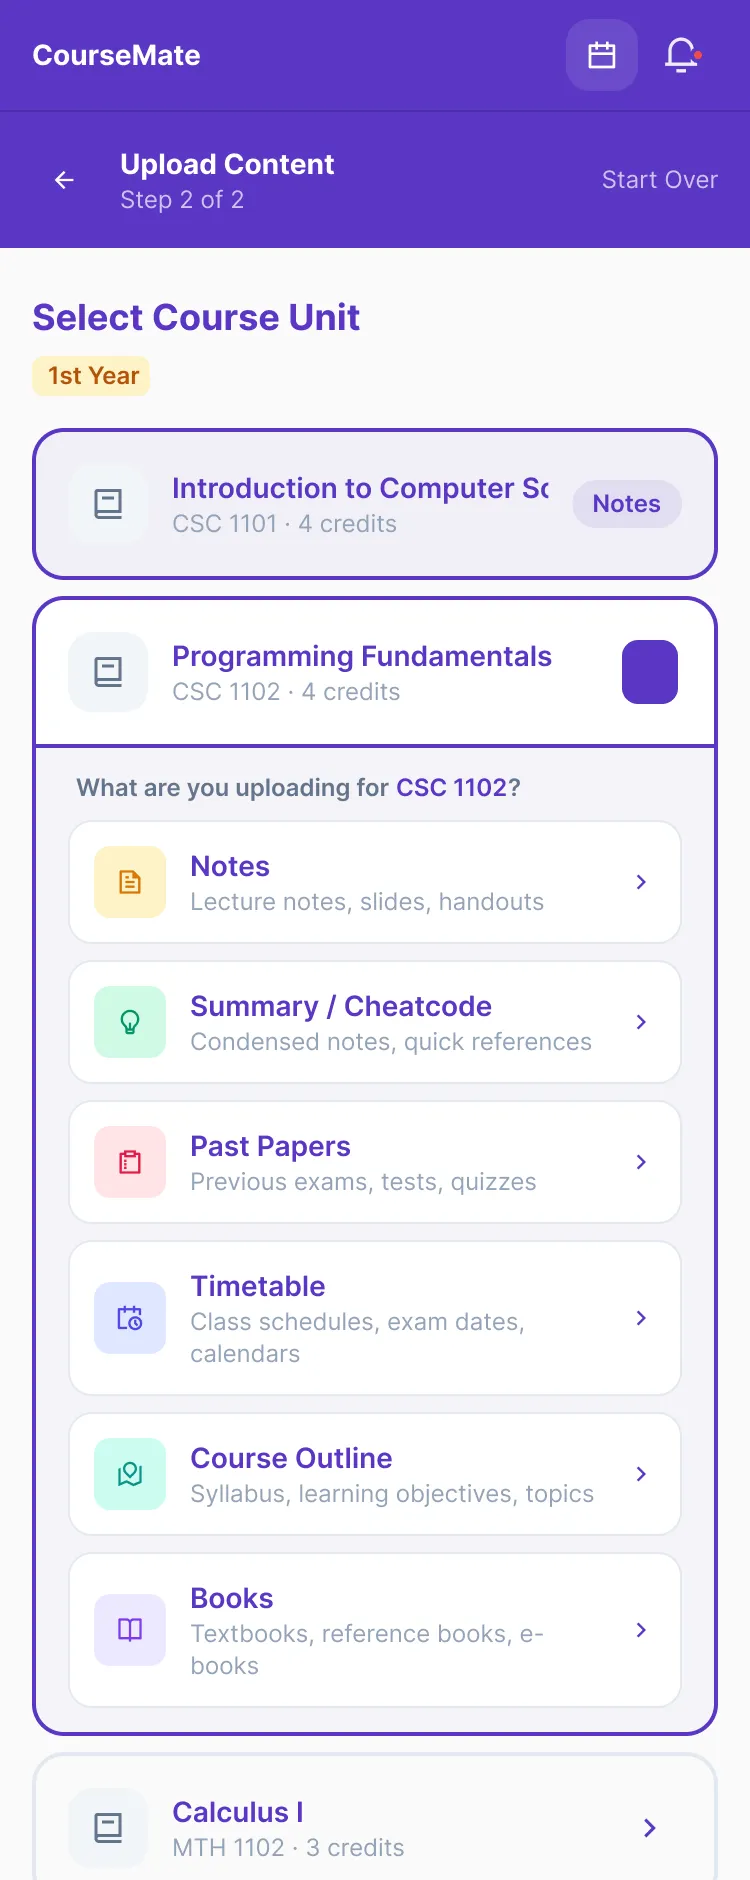
Seven types. The unit is already set. -
Add files, then price them
1–20 files in a batch, and you can add more later. Give the whole batch one title, description and price, or set them per file. Every upload is free or paid in UGX up to 999,999 — except notes, which are always free for students.
Videos: MP4, MOV, M4V or WebM. MP4 (H.264) plays for every student; some iPhone HEVC recordings will not play on older Android phones. Documents: PDF, Word, PowerPoint, Excel, images, text, CSV or ZIP.
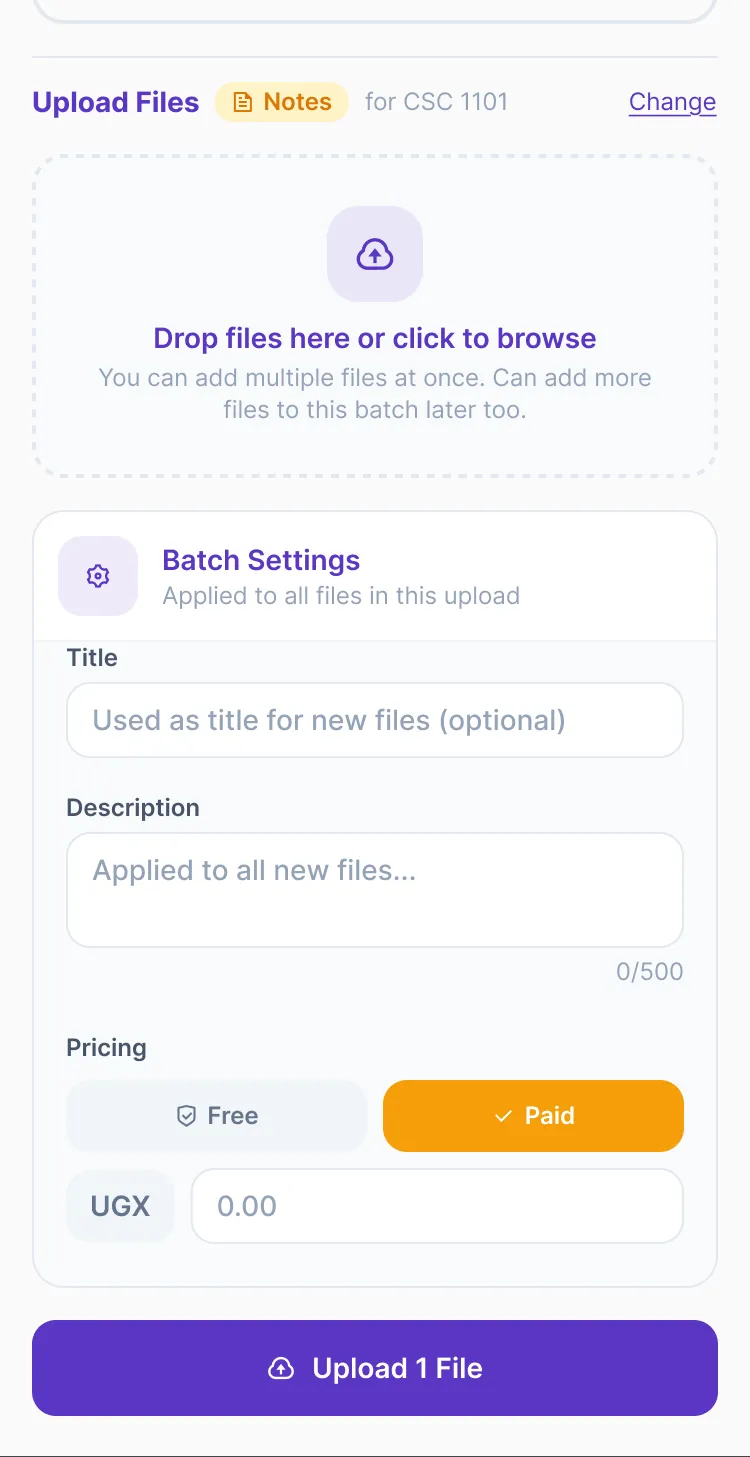
One price for the batch, or one each.
You can change a title, price, category or course unit after publishing and students see it straight away. To replace the file itself, upload it again.
Stage 3
Run live sessions
From the Discussion tab, tap Go Live. You can host for any unit on your approved application. You need a CourseMate wallet with a PIN first, because session earnings are paid into it.
-
Set it up
A title, the course unit and an optional description; a duration of 30 minutes, 1 hour, 1½ hours or 2 hours; and a price from UGX 1,000.
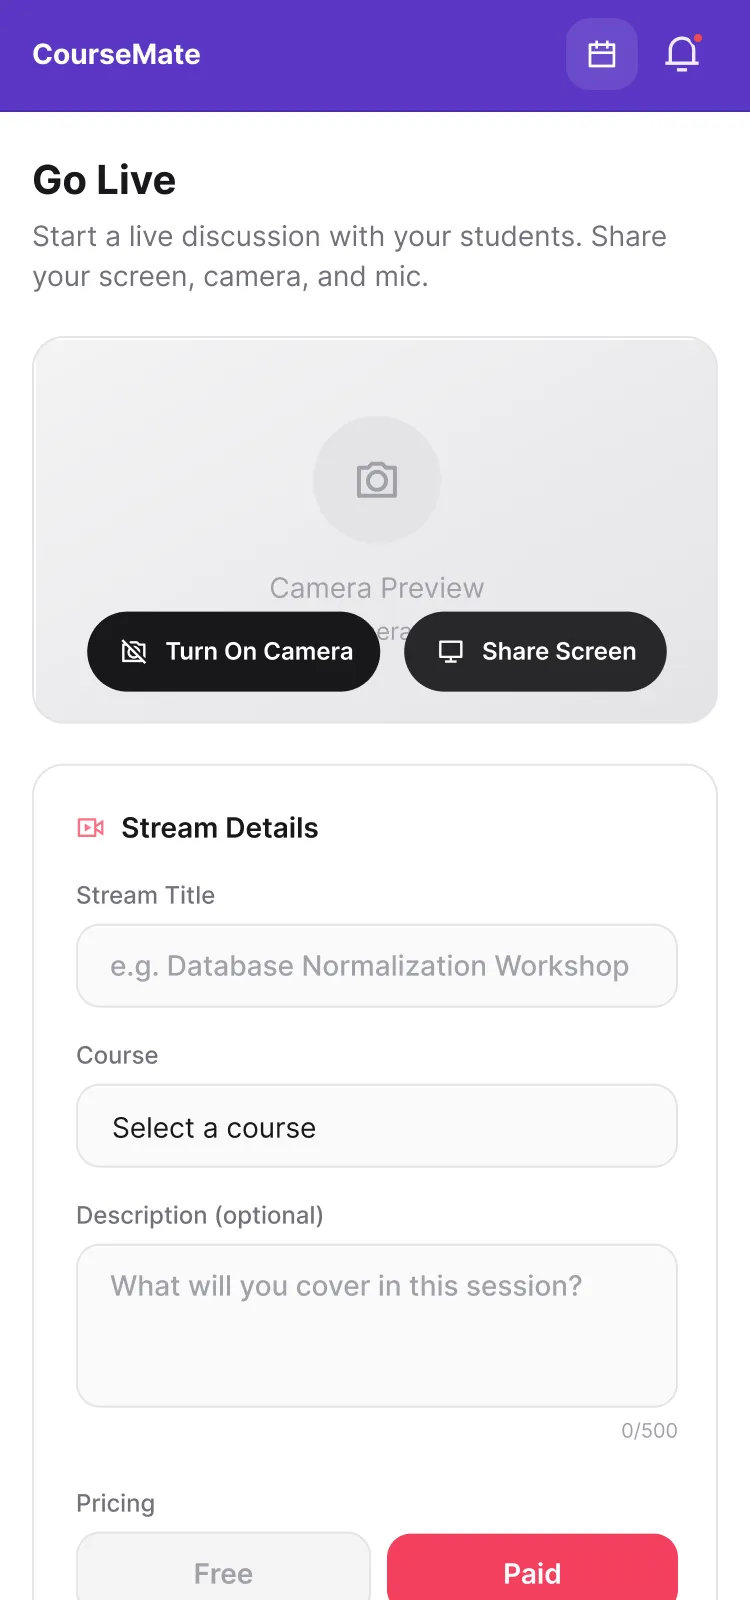
Camera preview before anyone joins. -
Now, or scheduled
Go live immediately, or schedule up to a year ahead. Scheduled sessions show to students under Upcoming, live ones under Live now. Students pay with mobile money and the payment is held in escrow until the session ends — so they only pay for sessions that actually happen.
In the call you have camera, microphone, screen sharing and chat. Students raise a hand and you choose who speaks.
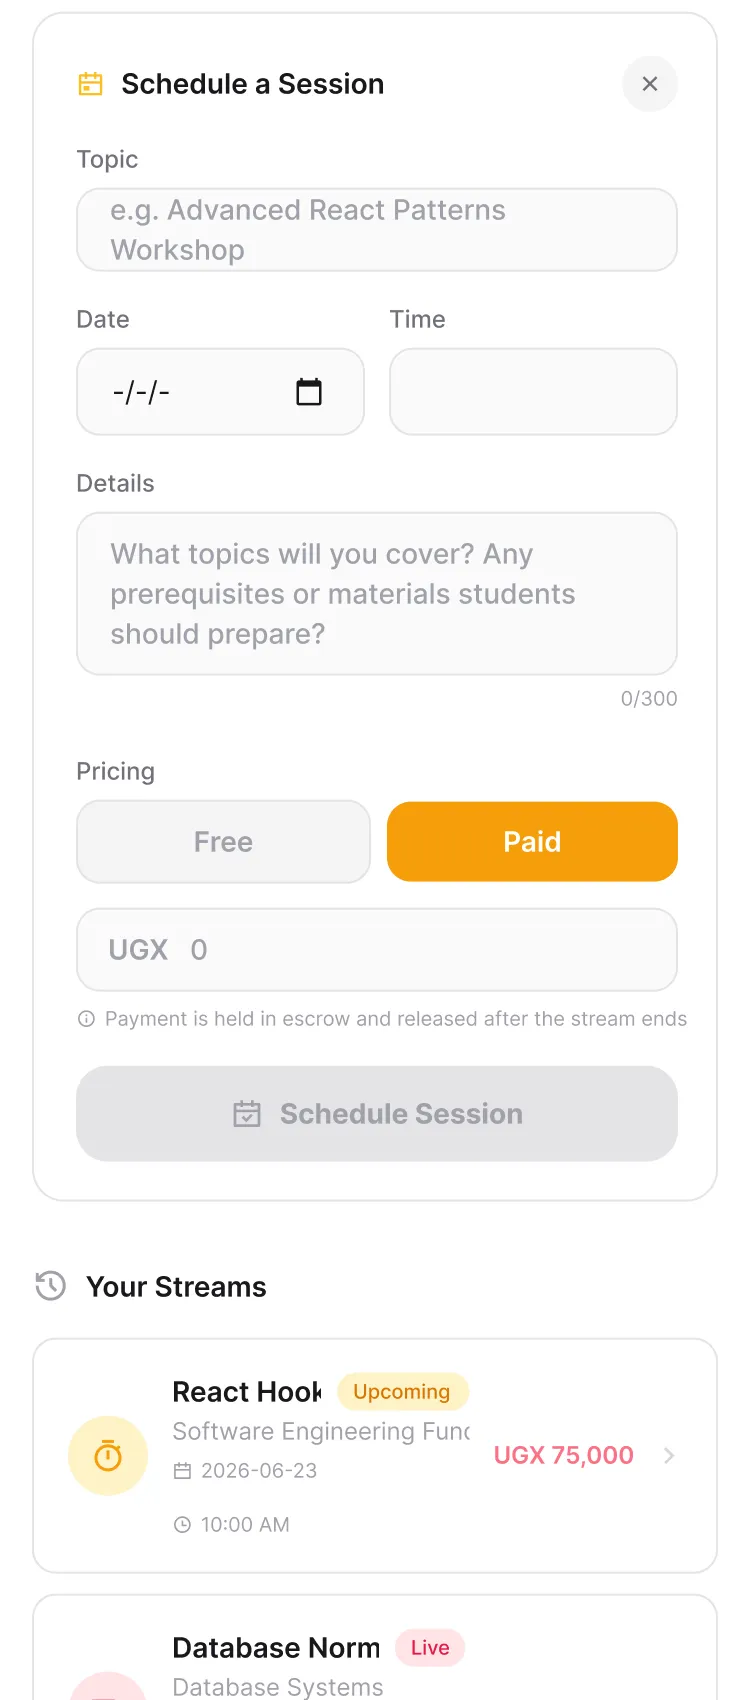
Schedule up to a year ahead.
Stage 4
Get paid
Live sessions pay once. Everything else keeps paying: each time a student unlocks your tutorial, summary, past paper or book, the sale is credited to your wallet. Sessions are recorded too, so students who missed one can buy the replay afterwards.
-
Watch what sells
Analytics shows students reached, total revenue, your rating and review count, resources uploaded, and your most sold, downloaded, liked and shared items — this week, this month or overall.
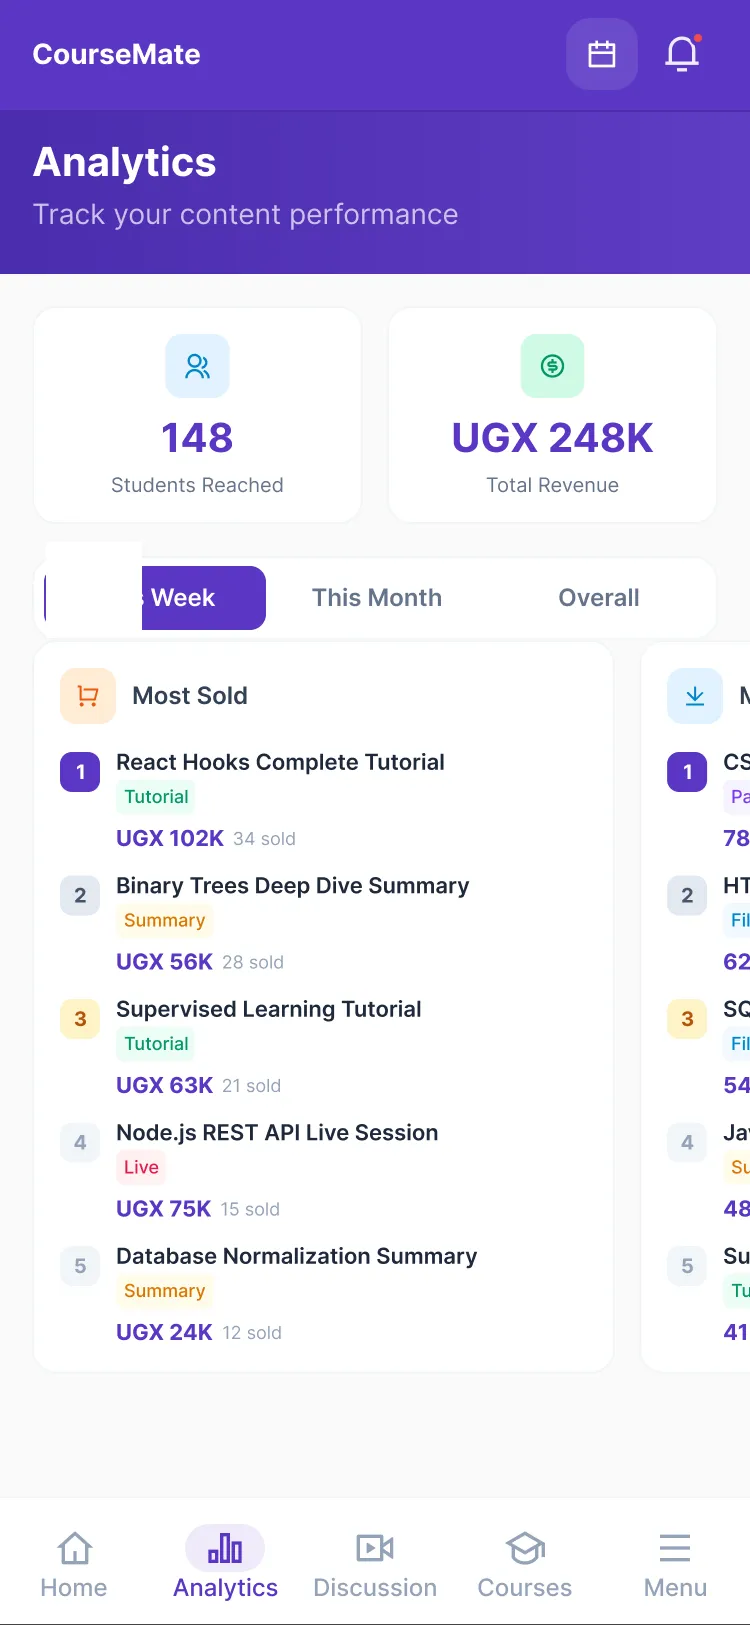
Upload once, sell to every cohort. -
Your wallet
Sales and session earnings land in a CourseMate wallet in shillings. Deposits, sales, withdrawals, fees and refunds all appear in your transaction history.
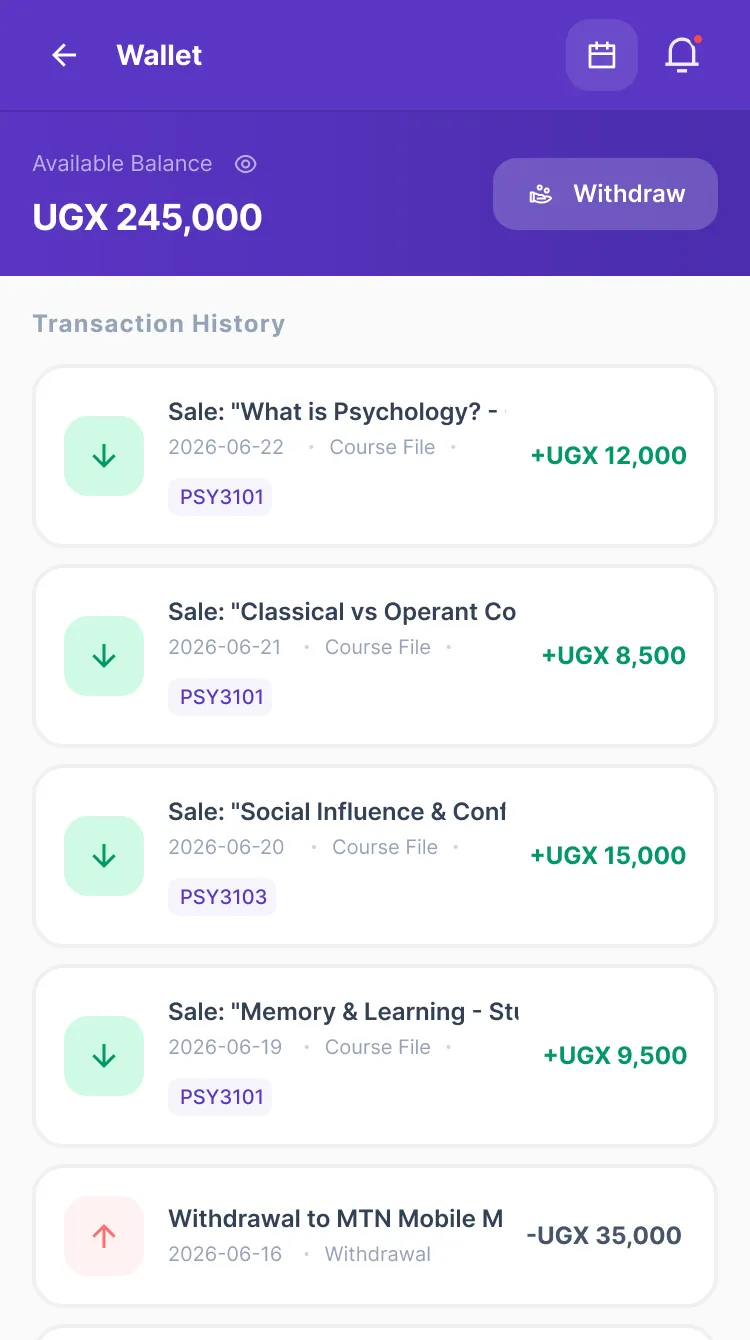
Everything that moved, in one list. -
Withdraw
Tap Withdraw Funds and enter an amount, confirm with the six-digit code sent to your phone and your wallet PIN, and the money goes to the MTN or Airtel number on your profile. There is no payout day to wait for.
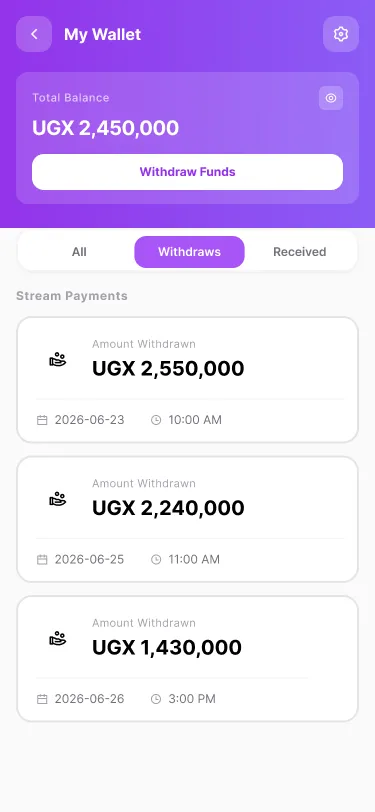
Withdraw whenever you like.
Becoming a Facilitator
Facilitators are lecturers and instructors. Same tools as Student Experts — content, pricing, live sessions, analytics, wallet — with a registration built for instructors rather than students, and up to 40 course units across any programmes and universities.
Stage 1
Sign up
Choose Facilitator when you create your account. Your account exists immediately and gains full access once verification is approved.
-
Personal details
Full name, email, mobile contact and a profile picture.
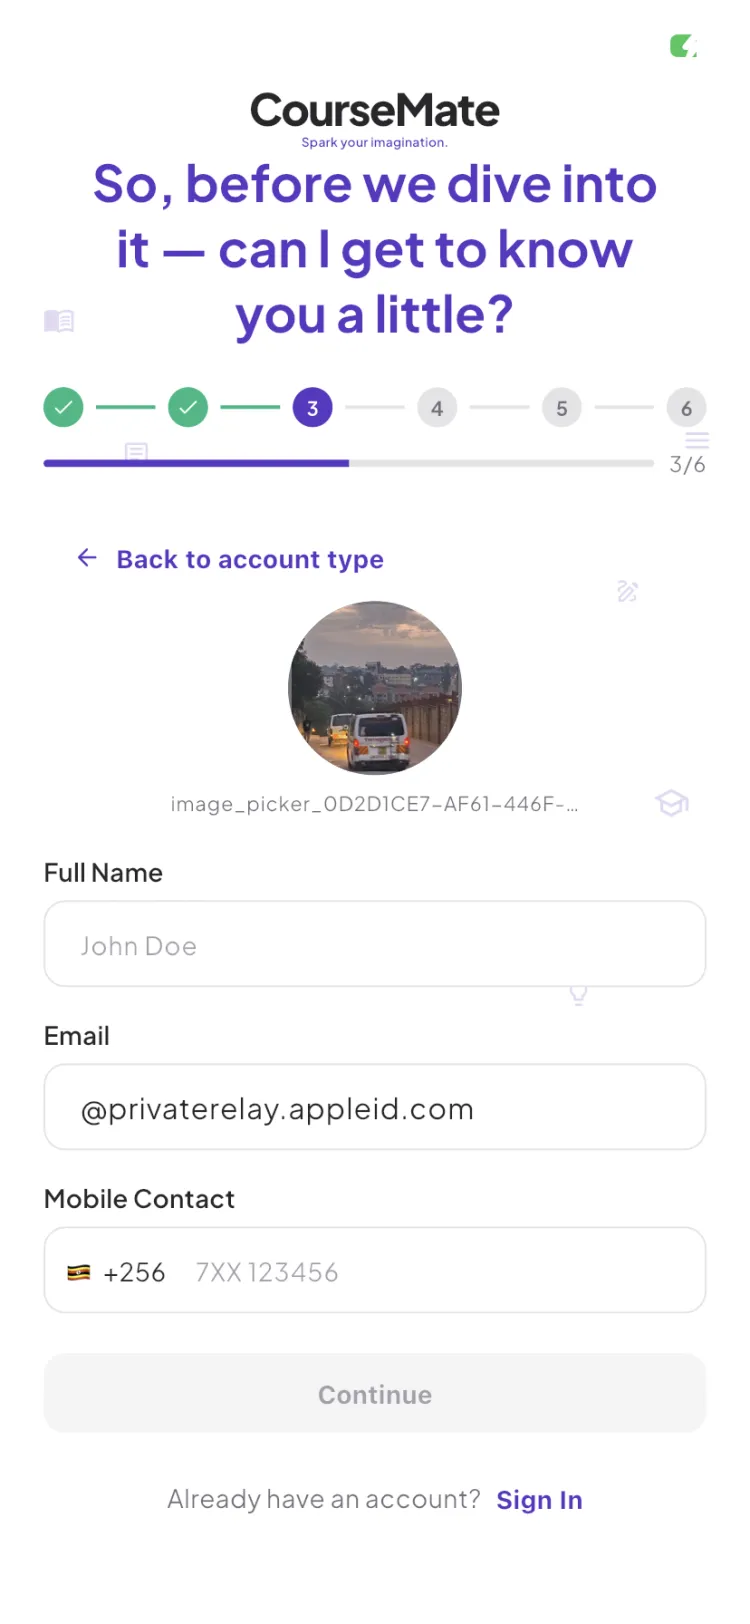
The usual details, and a photo. -
Choose Facilitator
A facilitator account is an instructor account only — there is no student view to switch to, which is the main thing that differs from a Student Expert.
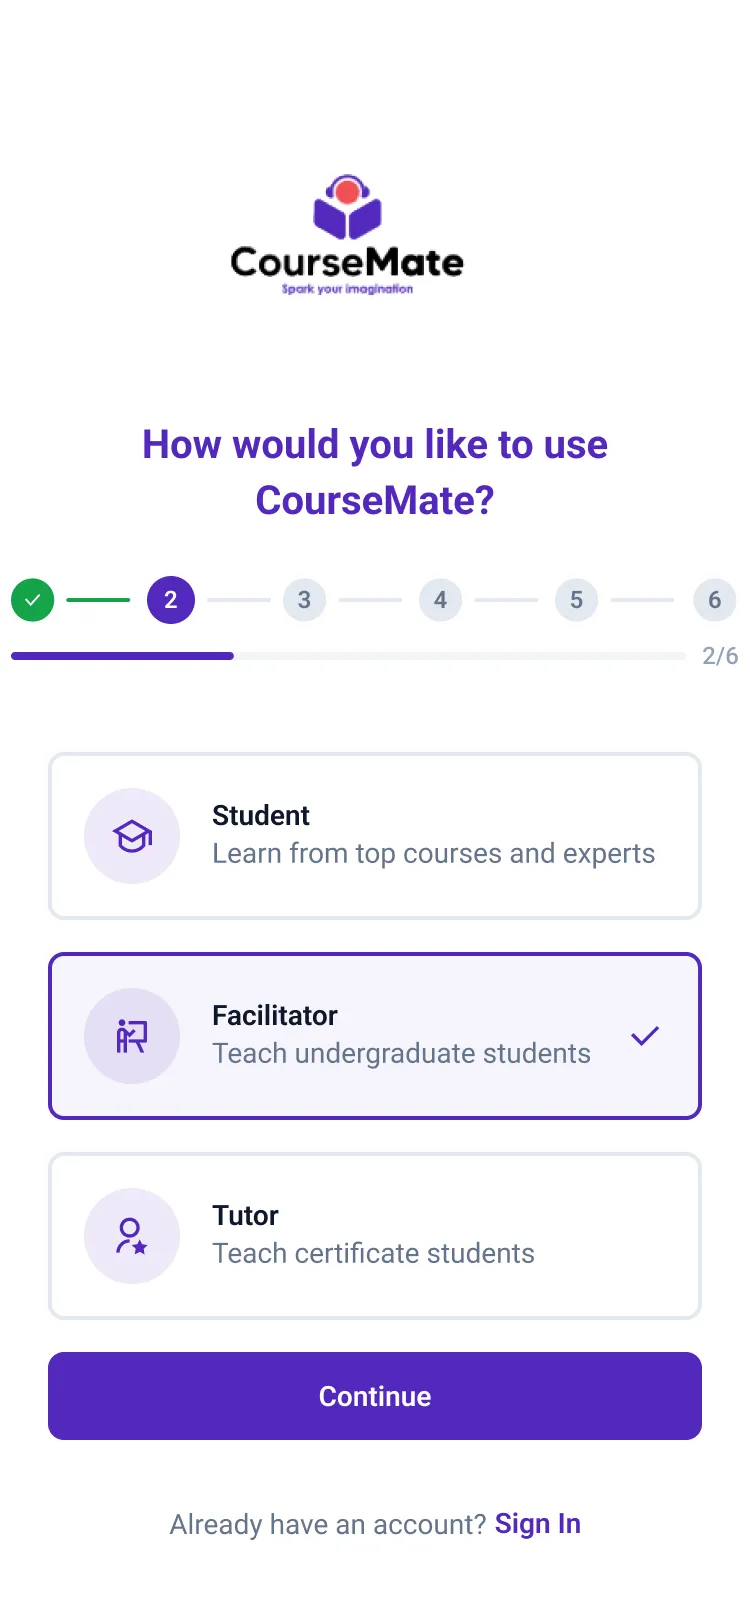
Pick this at sign-up, not after. -
Universities and units
Pick the university and programme, then the course units you can facilitate. You can add units from other programmes and universities — up to 40 in total.
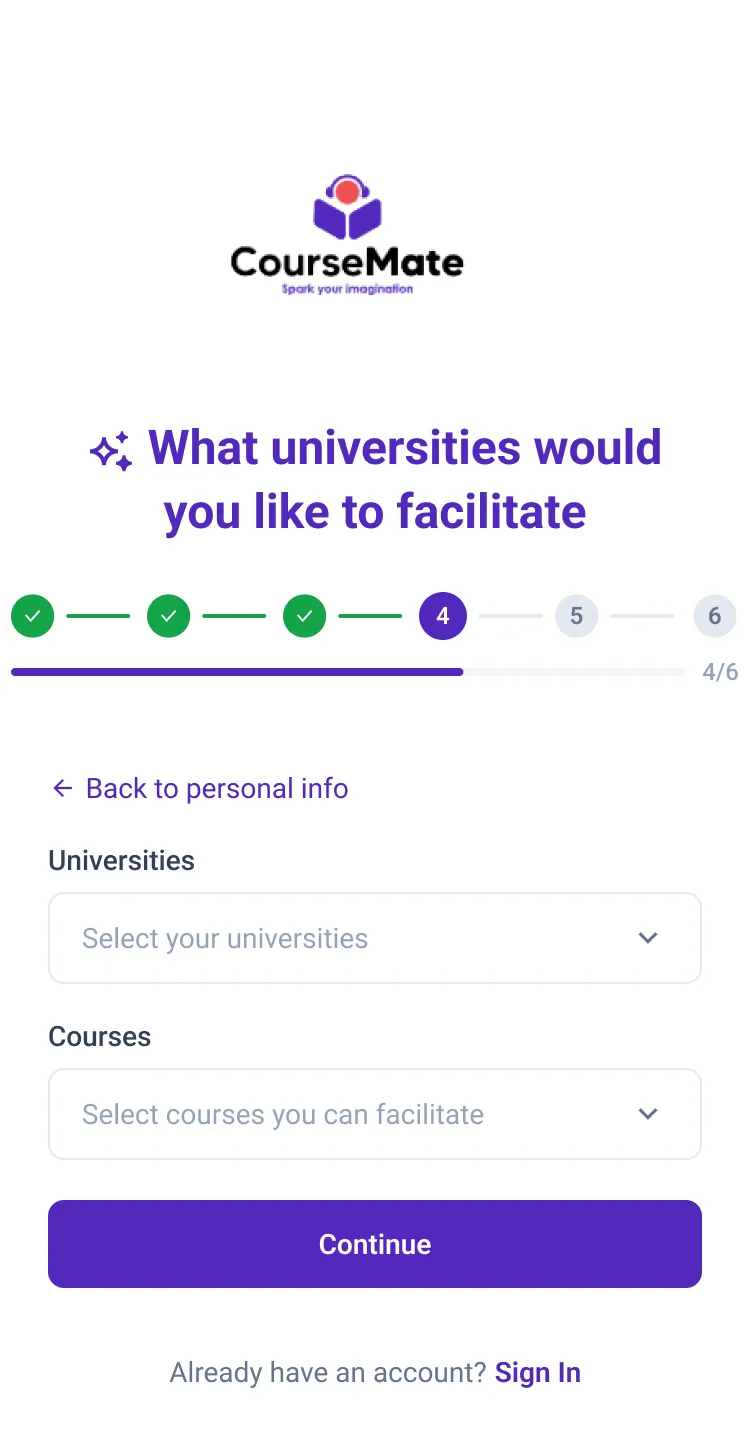
Across programmes and universities. -
Your profile
Your area of expertise, your highest qualification — PhD or doctorate, masters or MPhil, bachelors or BSc, or a diploma — and a short bio of at least 50 characters.
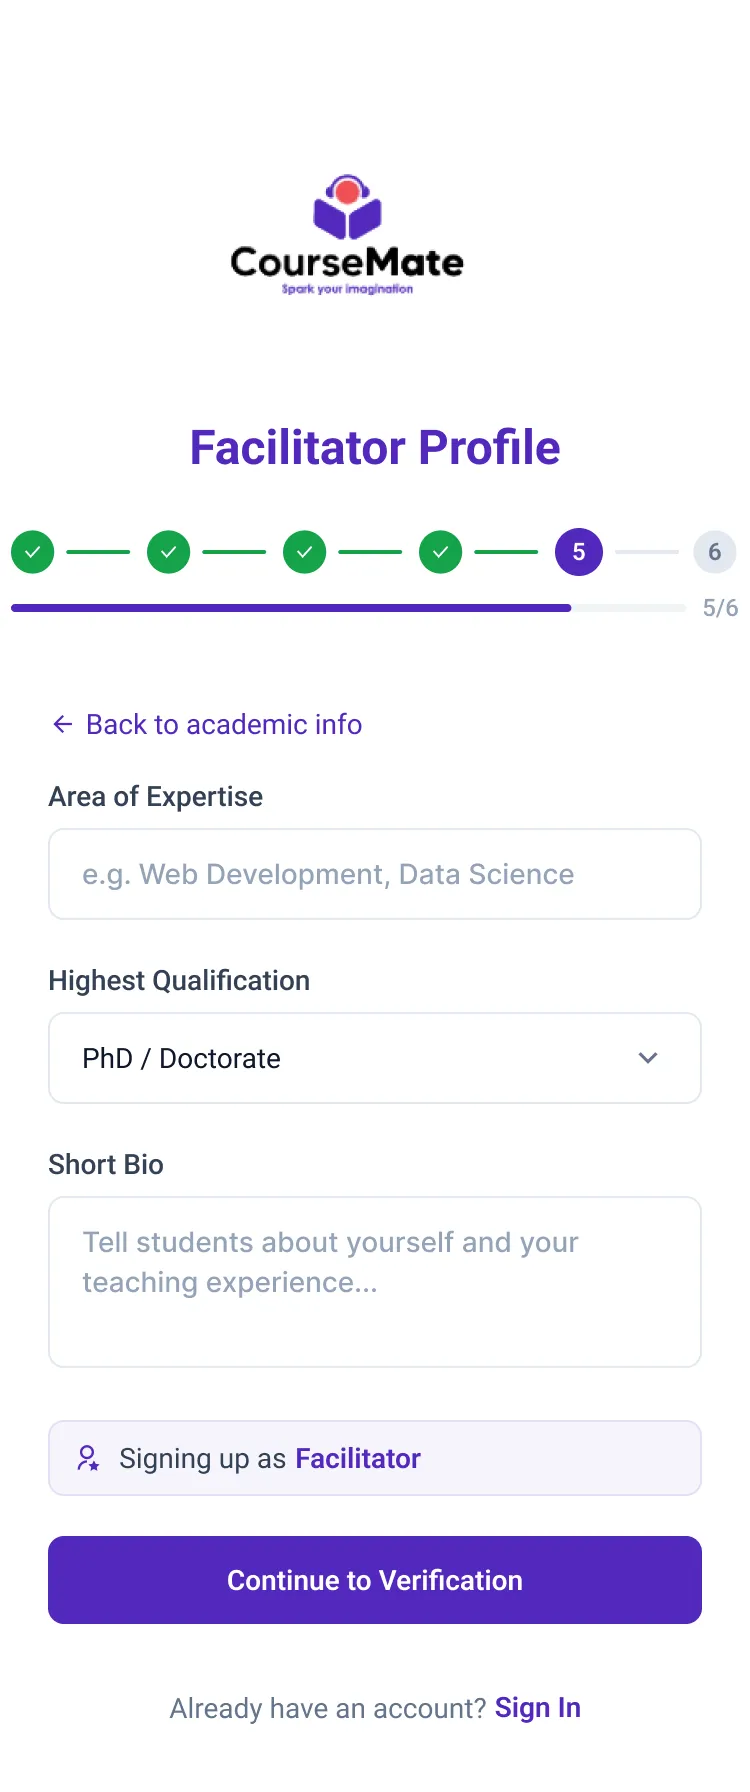
Students see this on your public profile.
Stage 2
Get verified
-
National ID and qualifications
Your National ID and a university transcript or results — JPG, PNG or PDF, up to 10 MB. Every instructor verifies their identity. Documents are encrypted and reviewed within 24–48 hours.
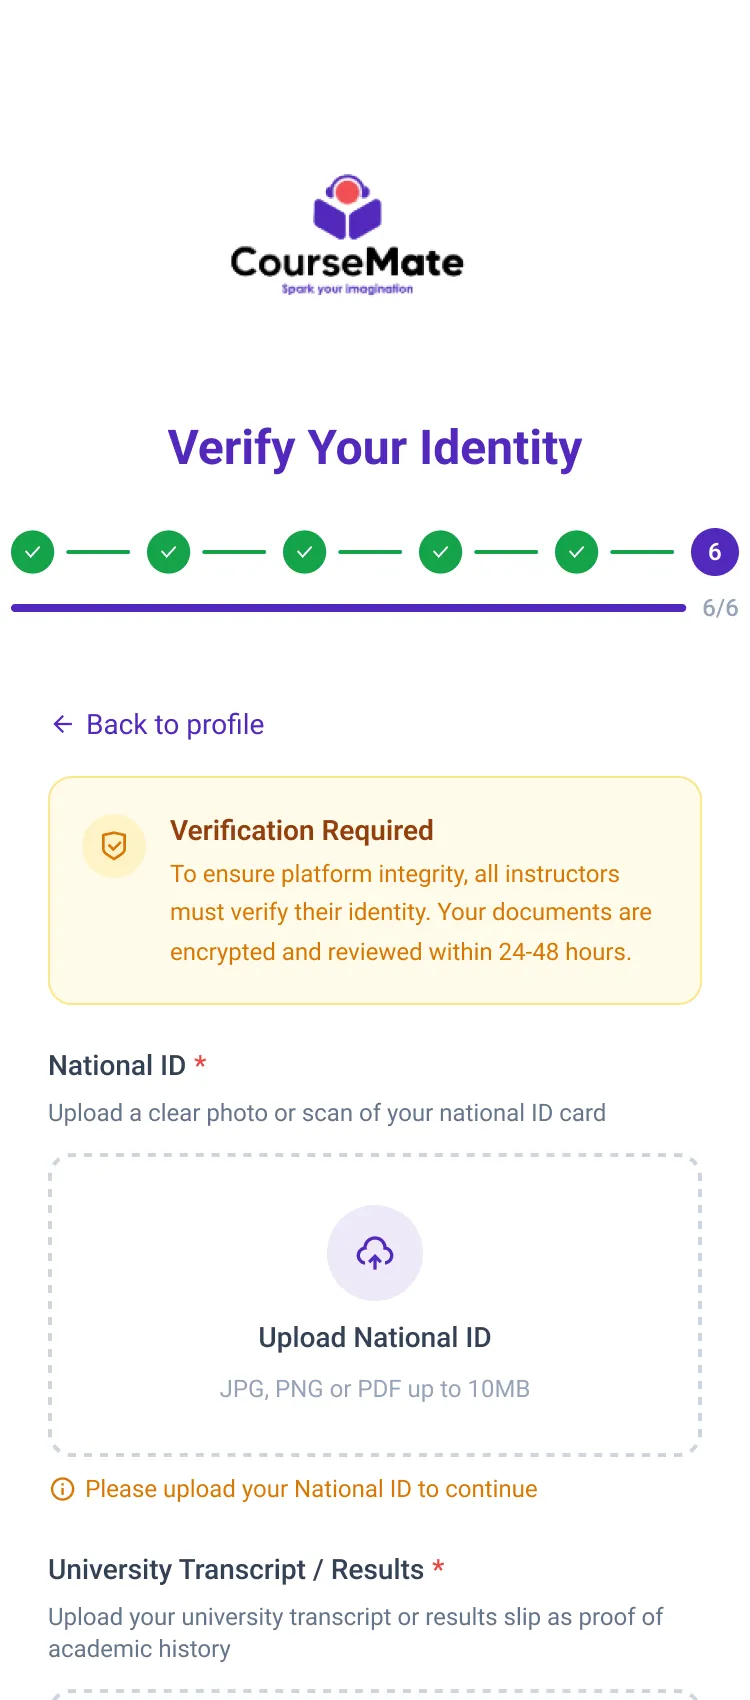
Reviewed within 24–48 hours.
Stage 3
Upload and teach
-
Upload content
Upload Content asks for university → programme → year → course unit, then the file type. The seven types, the file rules, the covers and the batch settings are the same as for Student Experts, and so is the pricing: free or paid in UGX, with notes always free.
Live sessions sit under the Live tab — same durations, the same UGX 1,000 minimum, the same escrow, the same in-call tools, for any of your verified units. Recordings, analytics, your public profile and the wallet all work exactly as described above.
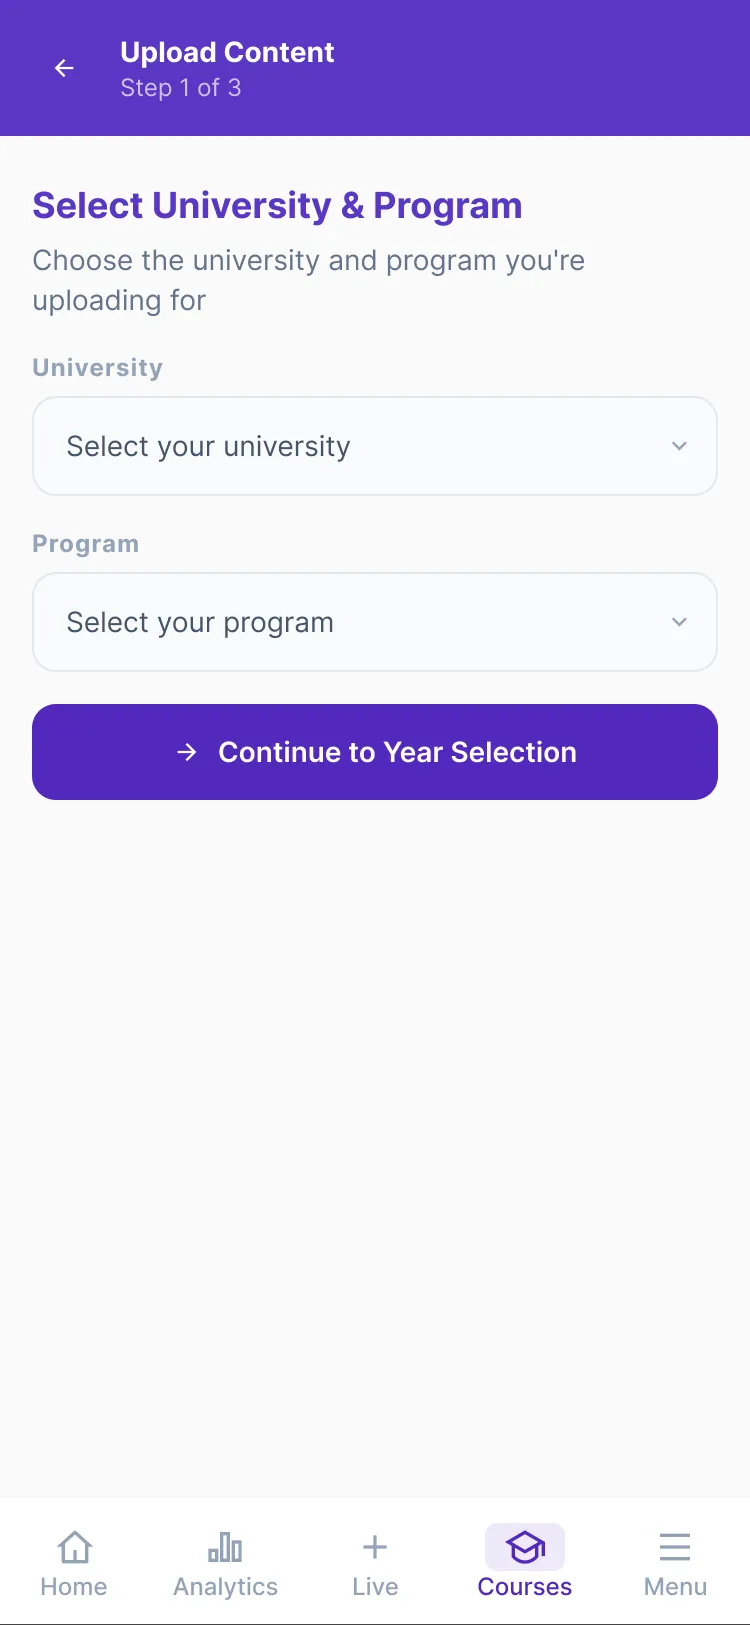
University first, because you may teach at several.
Ready to start?
Both flows begin in the app. Questions the guide does not answer are on the expert and facilitator pages.